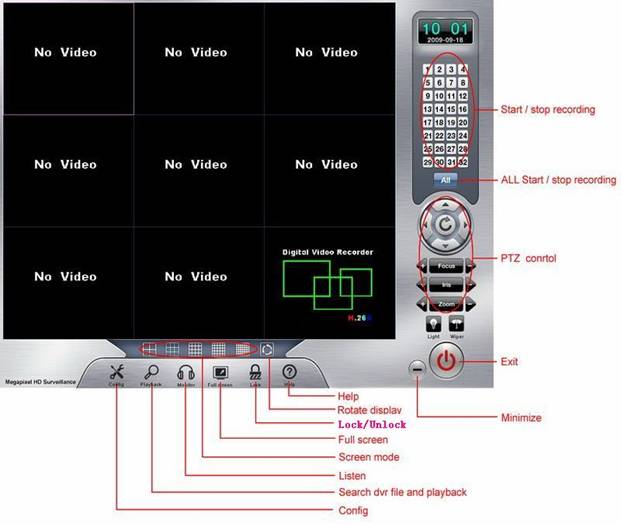
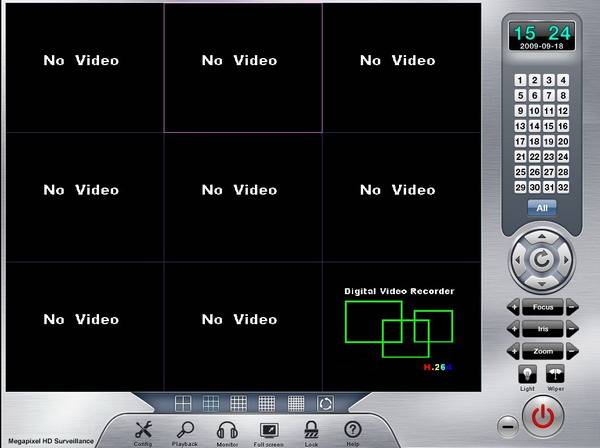
Introduction of the main interface (DVR)
Before running the DVR system, please make sure the resolution of your computer screen is
1024*768 or 1280*1024, 32bit. (17 inches upper, suggest choose 1280*1024, image quality
will be better).
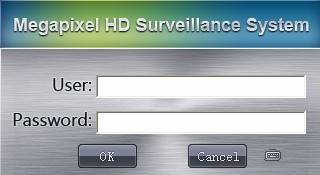
Log in DVR system
start->program->DVR->DVR
Click![]() button,coming
into “config” interface:
button,coming
into “config” interface:
The default user name and password is empty, please click “ok” directly.
Suggest user to setup a new user name and password, (Please refer “user” in “config”)
Video
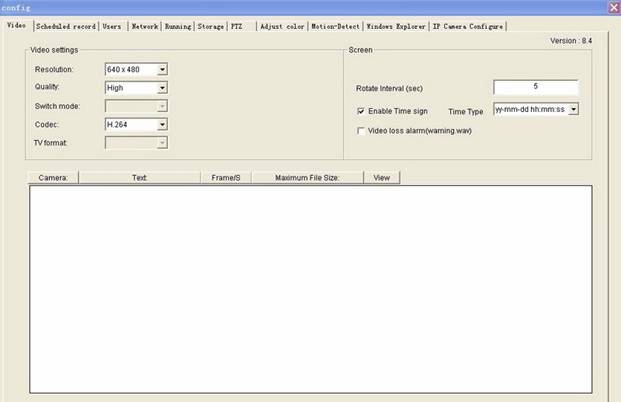
Video Format: Choose the video format as per your cameras.
Resolution: PAL: 352*288, 704*576
NTSC: 320*204, 640*480
Rotate interval: support rotate
4 screens once circularly\
Name:You can name each camera by yourself.
Enable time sign:enabled,will show time at the right corner of the screen when playback.
Limit of file size:limit of file size per hour.
View: if check this item, then you can view lively. If not checked, the image will not be displayed but it will be recorded normally.
As the above picture show:you can name every camera in ”text”, such as name camera1 as “street”. Correspondingly at the left top of the channel screen in the main interface, you can see the name “street” , please refer the below picture:
Scheduled Record
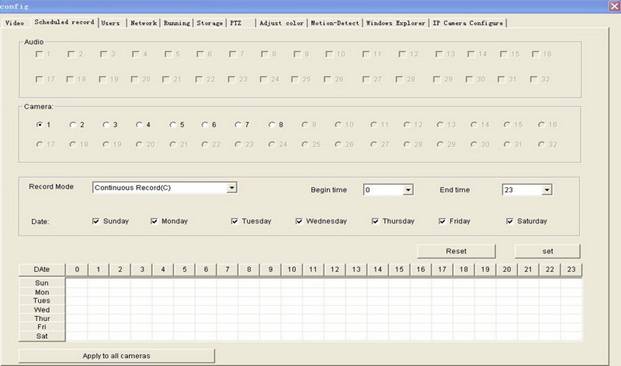
Audio:
Choose the cameras, then you can both monitor and record voice, if not choose you can just monitor. (for 9404A only)
Record mode:
“continuous record”: record continuously
“motion detection”: record when there are movements, please refer “motion-detection”
“no record”: just view lively,do not record
Begin time and End time:
From 0:00 to 23:00
Date:
Choose the dates you want to record, then click “add”, if you want every camera have the same settings, please click “apply for all”, then click “ confirm”.
If change the settings, please click “reset”, then setup again.
You can set up different record modes in different time period for the same camera, please refer the below picture:
User
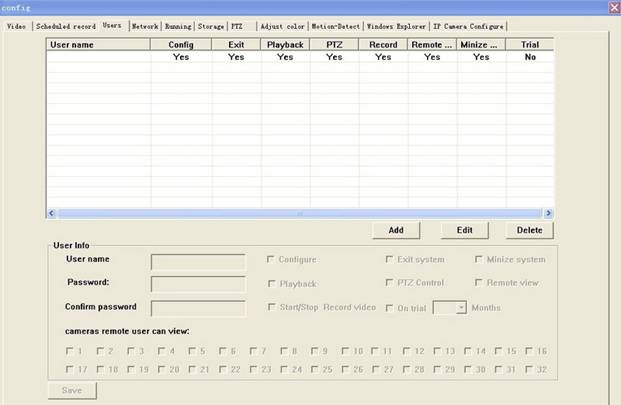
Administrator can setup, manage and change the rights of the sub-users:
1:Add
Click“add”button,user information was activated,Check the functions you want the sub users have. The functions not checked will be not available for the sub users.
2:Edit
Choose one user,click“edit”,user information is activated,can change the setting according to your requirements.
3: Delete
choose one user,click“delete”, click“confirm”,user information deleted.
NOTE:Cameras remote user can view: Choose the cameras, the user can view thechosen cameras remotely, If not chosen, the cameras will not be remotely viewed by this user.
Network
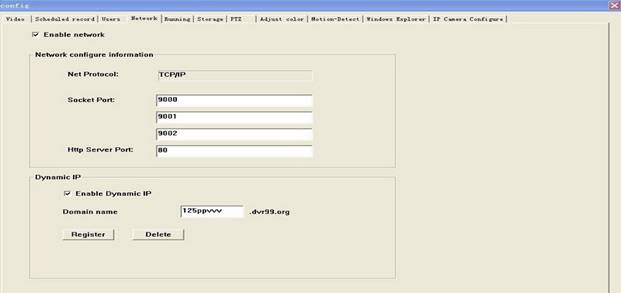
1)Choose“Enable Network”
2)In “networking”,can see relative network information of the DVR system. Data
will be transferred between DVR system and the client side through ports 9000,9001
, 9002. If remote view through IE, generally speaking, the default http server port is
80, you also can change it to other digits, which is not in conflict with the
other networking softwares in pc system, such as 90,8080.
Enable Dynamic IP,apply for a free domain name, such as abc.dvr99.org, the system will remind if it is applied successfully.
(wapa.dvr99.org is shenzhen wave-p’s online demo). After successfully applied, you can remote view through DVP and IE.
Just type in the domain name, user name and password. For internet connection way “ PC- ADSL-internet” only.
For static IP, just need to input ip address, user name and password is ok.
If internet connection way is “PC-router-ADSL-internet”, please refer “dynamic IP solutions” and “private IP Solutions” for more information.
Note:
If need to edit the domain name, have to delete it first, apply for a new one.
If need to reinstall the dvr system, please delete the domain name first, otherwise the original domain name can be not used after reinstallation,
only have to wait wapa.dvr99.org delete the original domain name one month later, then you can apply the same domain name again.
Note:9000、9001、9002 can be changed,better to be larger than 9000 to avoid conflicts with the other ports and have to be
three sequential numbers, such as 9004,9005, 9006.
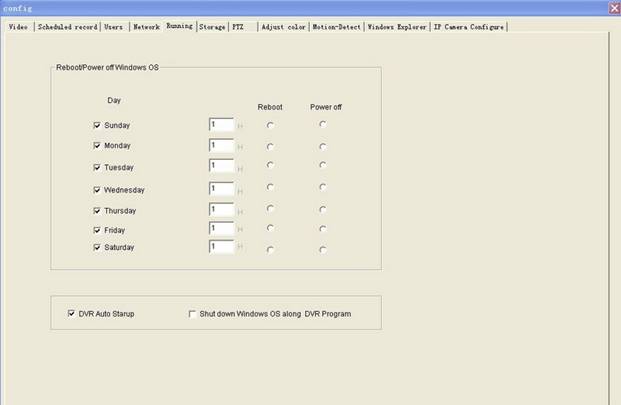
Running
Reboot:Reboot system on selected time and date;
DVR Auto startup with window:DVR system will start when the pc system is running
Shut down window OS along with DVR program:PC system will be closed along with you
Close the DVR system.
Note:Suggest users to reboot DVR once a week to make the system more stable.
Storage
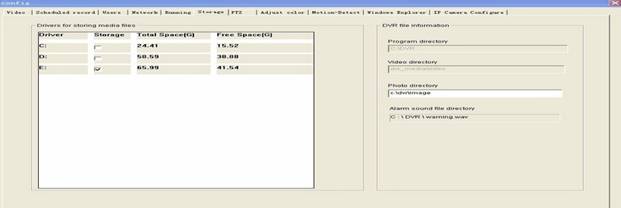
DVR system support recycle recording on multi-hard disks, choose the hard disk you need to save recording files on,
if you choose more than 1 hard disks, recording files will be saved in the number1 hard disk first, when number 1 is full,
files will be automatically saved in the second, then the third. When all the hard disks are almost full,
the system will delete the earliest files which is recorded on the first day in the first hard disk automatically to release some space
for the new video files, then the second, the third.
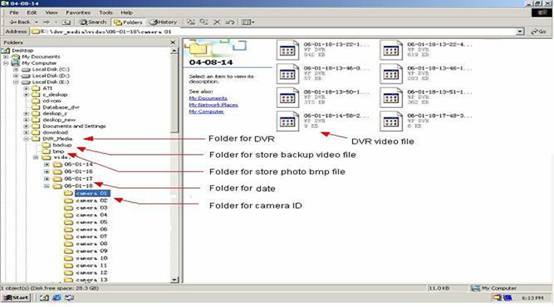
The video files are saved in the folder ”DVR media” as the below picture:
how to connect DVR server
Please type in ip address or domain name in IE, confirm then will get the below dialog box:
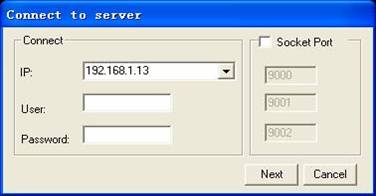
Type in IP、user name、password,click confirm,if connect successfully, you will get camera number list at the right side of the interface:

User also can click![]() come
into the log in dialog box again, type in the ip of the other dvr servers, user
name and password, then can realize monitor several DVRs under the same IE.
come
into the log in dialog box again, type in the ip of the other dvr servers, user
name and password, then can realize monitor several DVRs under the same IE.